This is part 2 of my Project Phoenix Home Defense Shotgun build. Some of you may notice that I’ve changed the name of this build. Originally this little terror was know as Project Screw Cuomo but cooler heads have prevailed. I initially conceived this project as a good example of a Home Defense Shotgun that could be built on a budget. Since New York State has seen fit to pass an onerous Gun Rights Restricting Law veiled as the sweet sounding SAFE Act, I can no longer use my AR-15 to defend my home. So I thought building up a budget shotgun would be a good idea. In the first part of this series I detailed how I got this shotgun, now I delve into what I’ve done to upgrade it.
The Brass Bead was sheared right off at the base when I first got this shotgun. A trip down to my local gun shop and I secured the proper new bead. I had thought of putting a fancy new front bead on but for $10 I chose to go down the frugal route. Besides the bead has worked for a long time on shotguns and I wanted to keep this one on the cheap side. I was surprised at how well I’m able to pick up the bead when trying to sight this thing quickly. Maybe down the road I’ll upgrade to something fancier but not now.
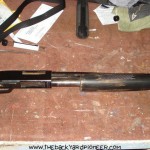
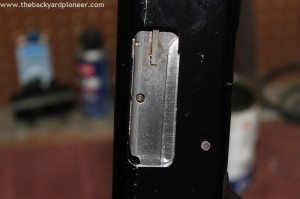
I had to scrub the heck out of the bolt on this gun. This shotgun had seen years of either hard use or hard neglect! I disassembled the entire and cleaned it out as well as I could. The bolt still shows a little bit of the gunk and grime that covered the entire innards of this beast. I had to soak the internals overnight in Break-Free CLP-5 Cleaner Lubricant Preservative and then have at it with a Scotchbright cloth to get it even close to clean.
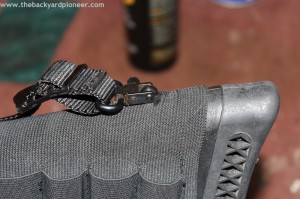
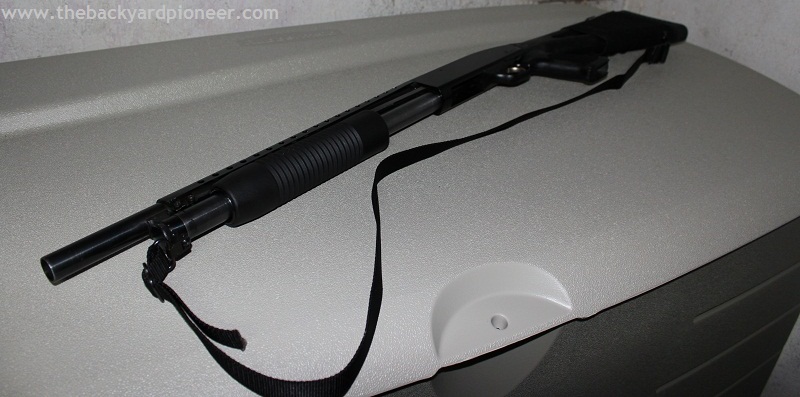
I had one of those Buttstock Shotgun Shell Holder lying around from a past shotgun build. The shot shell holder lets me keep 5 more rounds on the gun all the time. That is an impressive amount of firepower on hand when loaded with 00 Buck. I had to trim it a bit with a razor to get it to clear the sling. I like having a sling on all my long guns as I don’t like to set them on the ground if I can help it. The one I put on is a cheapy nylon one I had in my parts bin.
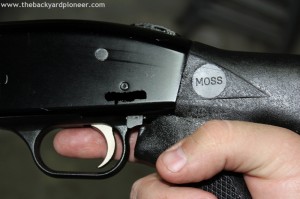
I had an ancient Choate stock in my parts bin as well. I’m not a fan of this stock but needed something to replace the pistol grip, this one came with. The Choate piece is a solid stock and is built with quality. My gripe with it is, I can’t run the shotgun the way I was taught. I was taught to use my index finger to operate the slide release and thumb to hit the safety. This is impossible to do with the Choate. I don’t like to remove my strong hand from the gun to manipulate the controls. With a traditional stock set up, the Mossberg can be run with out any gross hand movements. This bothers me enough that when funds allow I’ll be getting a Hogue Stock Mossberg Shotgun Stock
I also added a heat shield and an OEM Mossberg fore-end to this shotgun. I think I’ve built and economical Home Defense Shotgun that can admirable fill the void left by my AR-15. I’ll be using this gun in a Home Defense Shotgun Course this Spring and am looking forward to seeing it run. If anything I learned a lot about the inner working of the Mossberg 500 by tearing into it. What do you all think about this one? Not bad for $160 total investment!
If you like what you read here on The Backyard Pioneer please consider subscribing to receive e-mail notifications or check me out on Facebook, Twitter, YouTube, Pinterest, or my RSS Feed. All of these are available on the top right of this page.
Brought to you by:

Affiliate Disclosure: I am grateful to be of service and bring you content free of charge. In order to do this, please note that when you click links and purchase items, in most (not all) cases I will receive a referral commission. Your support in purchasing through these links enables me to keep the content train rolling




Seems to me that as states such as NY pass laws making it very difficult to defend your own, you’ll also need to get more creative on what you will do with the “evidence” for those who choose to test your resolve. I mean, it’s not like you’ll be able to call LE and report having just taken out a “threat”! Something to think about?!!!
Sad that it is coming to that. I’m trying to set-up a Shotgun class around here for the Spring and I’m looking for a lot of classroom time on the legalities of Home Defense to be included.
The biggest problem with the Mossberg 500 is the design of the slide release and safety. They basically make it impossible to effectively use a pistol grip of any kind, as you pointed out. I put a pistol grip on my Mossy and switched back to the stock polymer grip/stock the following day. My next home defense shotgun will be a Remington, which doesn’t have this issue.
I found the pistol grip only works if it is a “true” PG with no stock, and that wasn’t much fun to shoot. It does close the door on some of the newer stocks with the AR style stuff on them.
Utah welcomes you and your AR. What about heading over to New Hampshire for the free state project?
My 2 cents for people looking at shotguns. If you want a pistol Gripe and you want to operate the safety. Go with the Remington over the Mossberg. Because the of the tang mounted safety. If using the safety is not part of your plan and/or you never plan on using a pistol grip than either shotgun is great choice.
talking about plan. Think of Israeli carry method as to why you don’t use the safety.
New Hampshire is on my short list, my isn’t a huge fan of the cold, so going further north is a bit of a tough sell. What is this Israeli carry method you speak of?